
How To Restore Headlights
Headlights
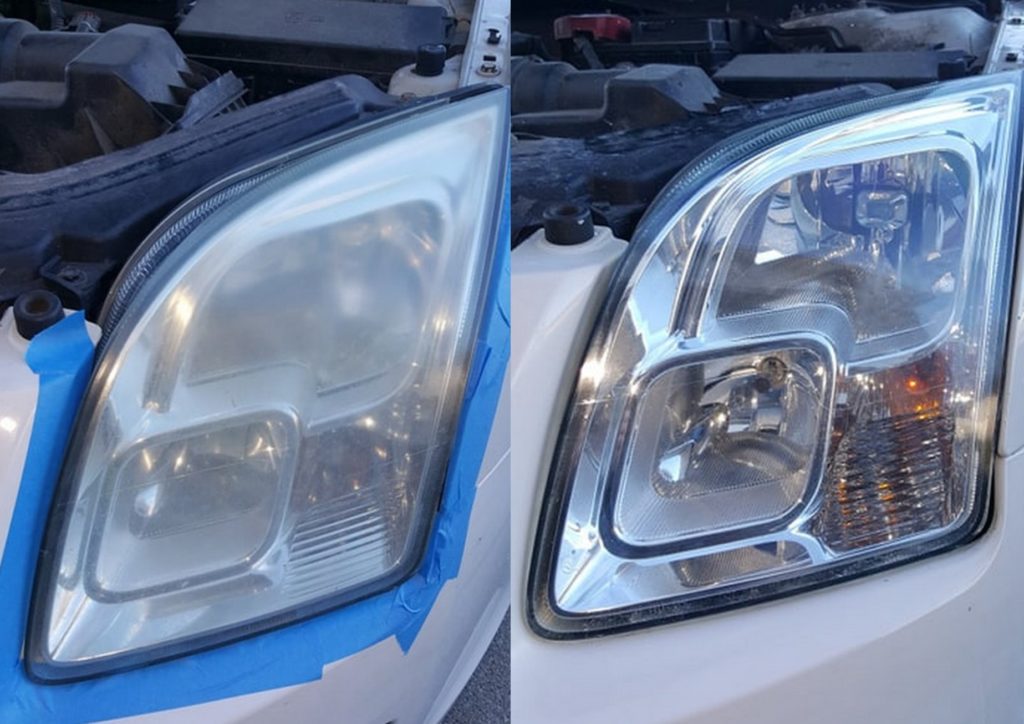
Modern automotive headlights are made of polycarbonate. Over time, the Sun’s harmful UV rays and the elements can turn clear polycarbonate headlights yellow and hazy or foggy looking. The hazy condition is unsightly and can be dangerous. According to AAA hazy headlights can reduce headlight output by as much as eighty percent.
Most headlights can be restored to like new condition. All you need are a few supplies, some know how and a little elbow grease. I found a good tutorial on YouTube. The video can be seen below. There are various methods and materials recommended for restoring headlights. For this article we’ll just focus on the techniques and supplies used in the video.
Supplies
If you’re going to restore the headlights on only one vehicle, purchasing a restoration kit may be the way to go. See product recommendations towards the bottom of this article. If you’re likely going to restore headlights on more than one vehicle or you can use the supplies for other projects, select the supplies from the list of links below.
The supply list is relatively short and inexpensive. Especially, when compared to replacing expensive headlights. You should be able to restore several set of headlights with the supplies.
My Supply List
- Wet Sandpaper (3M) – https://amzn.to/2Q7pblt
- Spray bottle – https://amzn.to/2ZBMoQ8
- Polishing pads – https://amzn.to/2QMSUzs
- Polishing compound – https://amzn.to/2SWsaiG
- Painter’s tape (3M) – https://amzn.to/2MDdAZa
My Process
I followed the basic instructions in the video. To start, I began by taping off the area around the headlights. This protects the paint and trim from sanding and the possibility of the polishing pads slipping. Moving on to the wet sanding I started sanding the headlights with 1000 grit sandpaper and finished with 2000 grit sandpaper. I made sure to keep the headlights and the sandpaper wet using the spray bottle. Then, I polished with the Meguiar’s Ultra Cut Polishing Compound and an orange polishing pad on the end of my cordless drill.
Looking back, I probably could have benefited from using a 2500 or 3000 grit sandpaper, a sanding block, and some finer polishing compound. Either way, I’m pleased with the results. You can use old fashioned elbow grease and a microfiber wax applicator in place of the drill and polishing pads.
Protection
Once restored you must protect the headlights from the Sun’s harmful UV rays and other elements. or they’ll quickly turn cloudy again. Spray clear coats and automotive polishes with UV protection are popular choices. Since it was only around 42 degrees when I performed the work, I opted to use an auto wax with UV protection. If you go this route keep in mind you’ll have to reapply the wax from time to time. I’ll probably apply a clear coat in the spring.
Meguiar’s Clear Coat – https://amzn.to/2SUB5kw
Rust-Oleum 2X Clear – https://amzn.to/2MXGnYB
Video Tutorial
Supply List From Video
1. Glass cleaner –https://amzn.to/2SBFCrT
2. Microfiber towels – https://amzn.to/2rA9Gci
3. Painter’s tape – https://amzn.to/2MDdAZa
4. Plastic polish – https://amzn.to/2jV9OPK
5. Wax/Sealant – https://amzn.to/35aRJPg
6. Wet sandpaper (3M) – https://amzn.to/2Q7pblt
7. Spray bottle – https://amzn.to/2ZBMoQ8
Headlight Restoration Kits
You can also purchase kits that contain the supplies needed to restore your car’s headlights. We’ve listed a few of the more popular kits below.
LED Headlight Bulbs
Join our Facebook Group!
[maxbutton id=”2″ ]

