
Fox Body Stereo Upgrade
My Foxbody still had the factory premium sound system it in. It was pretty good in it’s day when cassette tapes were all the rage. I must have my rock and roll when cruising around town. Today’s music comes in the form or mp3’s and via streaming from cell phones. My old cassette tapes are 30 years old and tapes don’t sound very well when compared to CD’s or mp3’s. It was time for a Fox Body stereo upgrade.
Fox Body Stereo Upgrade
I wasn’t really looking to do a full stereo system upgrade. A stereo swap and maybe some new speakers was about all I wanted to invest in for an occasional driver. I had an older JVC stereo that was not being used. That model isn’t available any longer. However, the JVC KD-X370BTS fits the bill for most of us in today’s digital world. It has USB capability, auxiliary input, and bluetooth connectivity. It even comes with Amazon Alexa. The process will be much the same regardless of the stereo you are installing.
- GENERAL FEATURES: CD car stereo receiver with AM/FM tuner, detachable face with white 13-digit 2-line LCD display, 2-zone variable color illumination, Amazon Alexa compatible, fits single-DIN dash openings
- BLUETOOTH and SMARTPHONE FEATURES: Built-in Bluetooth for hands-free calling and audio streaming, Streaming DJ feature allows five Bluetooth audio source devices to be connected, Amazon Alexa Enabled, USB 1.5A connection charges devices quickly
- AUDIO/VIDEO FEATURES: Plays CDs and USB memory devices, 13-band equalizer with digital time alignment, K2 technology improves the digital sound for all music sources, low and high-pass filters and subwoofer level control
- INPUTS: front-panel auxiliary input, front and rear USB ports – OUTPUTS: 6-channel preamp outputs (4-volt front, rear, subwoofer)
- INSTALLATION SIZE (WxHxD): 7-3/16 x 2-1/8 x 6-3/16 (182 x 53 x 156mm)
Prices pulled from the Amazon Product Advertising API on:
Product prices and availability are accurate as of the date/time indicated and are subject to change. Any price and availability information displayed on [relevant Amazon Site(s), as applicable] at the time of purchase will apply to the purchase of this product.
Tools
The only tools needed for the install are a couple of screwdrivers, drill, soldering iron and wire strippers. To remove the old unit you will need a set of DIN stereo removal tools. You can buy them for a few bucks or fashion your own from an old wire clothes hanger.
Factory Stereo Removal
It’s advised that you disconnect the battery before doing any electrical work on your car. After doing so, my next task was to remove the factory radio. I started by popping off the heater control bezel. It simply snaps into place. Next, I slipped the DIN removal tools into the holes one the four holes in the unit’s face and pull the unit out. Lastly, I carefully disconnect the wiring and antenna cable.

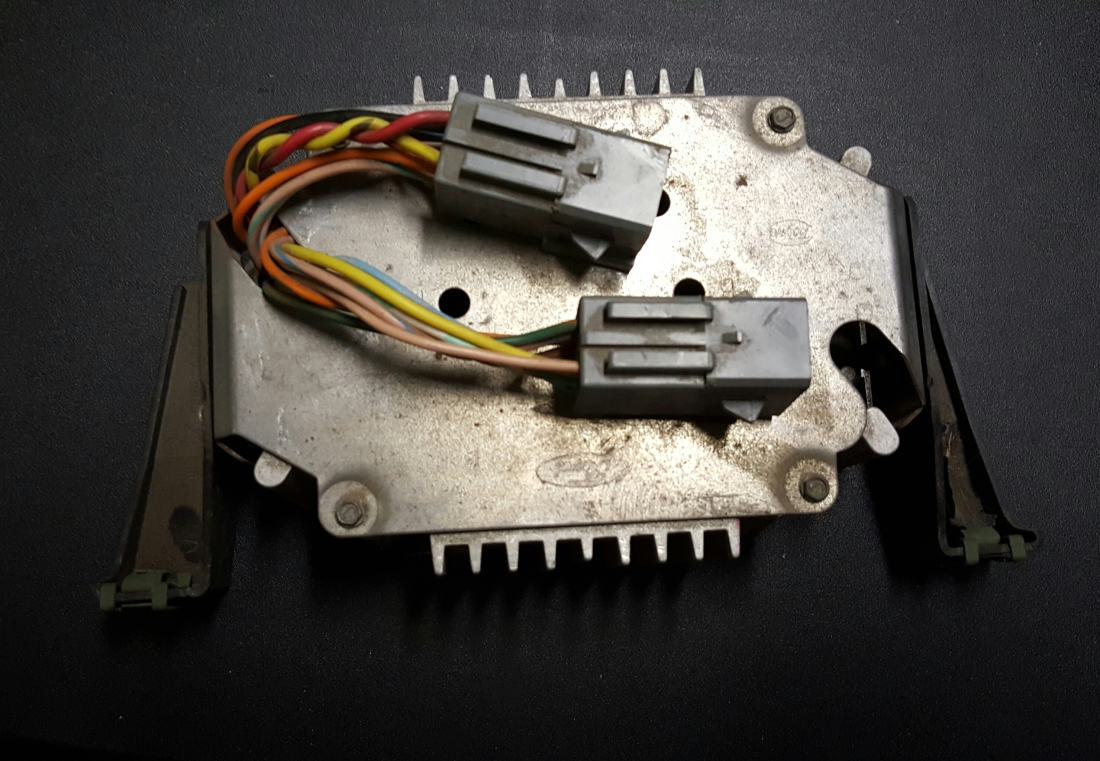
Factory Amplifier
Next, I removed the factory amplifier tucked behind where the radio once sat. My new stereo put out 50 watts per channel. Much more than the weak factory amp. By removing the two mounting screws and carefully unplugging the wires from the two harnesses, I was able to wiggle the old amp out of the car.
Dash Kit
I searched the internet far and wide for a stereo install kit that did not require drilling my car’s dash. I was unable to find one. After researching my options, I settled on American International’s FMK504P kit. I picked it up on Amazon for just under thirteen dollars. The kit included a factory looking dash bezel, mounting screws and instructions. I like this model because it included the factory like storage pocket. Some available kits do not include the pocket. This part fits 1987 – 1993 Mustangs.
- Compatible with ford Mustang 1987-1993 with pocket dash kit
- Factory look when complete
- The country of original is United States
- Finest material for good fit and durability
- Instructions and hardware included
Prices pulled from the Amazon Product Advertising API on:
Product prices and availability are accurate as of the date/time indicated and are subject to change. Any price and availability information displayed on [relevant Amazon Site(s), as applicable] at the time of purchase will apply to the purchase of this product.
Wiring Harness
The factory set up used a second set of wires for use with the amplifier and stock stereo. Hidden up and near the glove compartment is a second set of connections. These are the amp bypass connections. These are the ones I needed to connect to.
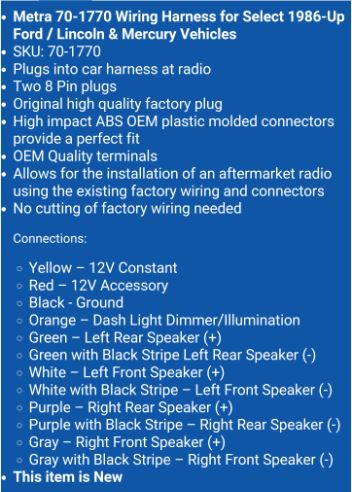
I didn’t want to hack up my car’s factory wiring harness. I found Metra’s 70-1770 wiring connectors on Amazon for under 5 bucks. This kit works on many 1985 to 2004 Ford, Lincoln and Mercury automobiles. These handy connectors simply snapped into my car’s factory wiring harness. If I ever want to revert back to the factory setup I can do so with ease.
- Plugs into car harness at radio
- Two 8 Pin plugs.Powers 4 Speakers
- Original high quality factory plug
- OEM Style
- Allows for the installation of an aftermarket radio using the existing factory wiring and connectors
- For 1985-2004 Ford
- Works only with factor amp in the
Prices pulled from the Amazon Product Advertising API on:
Product prices and availability are accurate as of the date/time indicated and are subject to change. Any price and availability information displayed on [relevant Amazon Site(s), as applicable] at the time of purchase will apply to the purchase of this product.
The wiring coming out of my JVC unit was very short. The car’s connectors were tucked way up under the dash. This would have caused a real issue during installation. So, I took the time to solder 12″ wire extensions to both Metra connectors. This took some extra time but would make the later installation a little easier. I used heat shrink tubing to cover all soldered connections. You could also use electrical tape. I placed a bit of masking tape on each extension indicating what color of wire they were attached to. Later on this proved to be a huge benefit.
Dash Kit Installation
Next came the step that I was dreading. Drilling the dash to accept the four mounting screws. Not because it was difficult but because there is no returning from drilling holes in the dash. I popped the heater control bezel back into place. I positioned the dash kit into place and marked the mounting hole locations. Next, I used a small drill bit in my cordless drill to pre-drill the mounting holes. Finally, I used my cordless drill to very carefully screw the four screws in to hold the dash plate. Don’t over tighten the screws as you could crack the plastic or strip out a hole.
Stereo Unit Installation
Next, I pulled the wires and radio antenna cable through the open hole of the dash kit. Using the chart below I connected the wiring. I read that the front speaker connections for the amp bypass wires are a little different than the char shows. By trial and error I was quickly able to figure out the proper connections. Don’t fret if your stereo only has one pair of front speaker wires. Both sets of front speakers will work once connections are made.
I connected the remaining wires and radio antenna cable. I opted to use wire nuts to connect the stereo’s wire harness to the Metra connectors. This will allow for an easy swap if I chose to swap stereos. Next, I slipped the stereo into place making sure the upper support bracket hooked onto the metal hanger under the dash. This ensures the radio will stay firmly in place and not crack the install kit. I did have to loosen the dash kit mounting screws a little to get the stereo to slip into place.
Finished Product
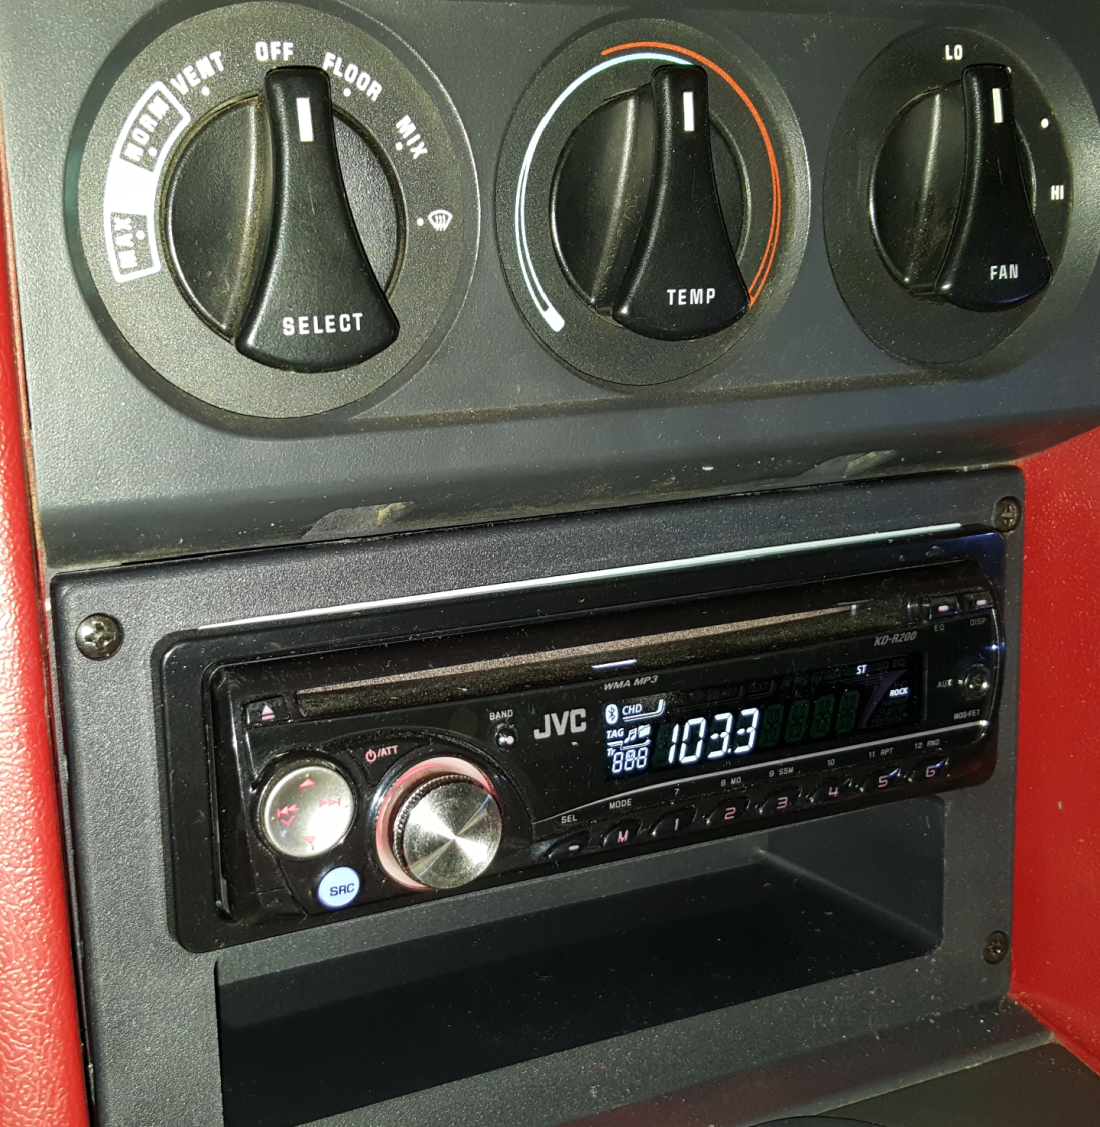
Overall, I am pretty pleased with the finished results. The dash kit matches the car’s interior very well. The radio is very solidly supported. After giving the stereo a sound check I am pretty pleased with the sound of the factory speakers. I may upgrade them sometime in the future. I am now able to play CD’s full of my favorite mp3’s and connect to my cell phone with an aux cord or blue-tooth. The pocket is handy for storing my aux cord or my phone.
I hope this helps someone else tackle a stereo upgrade in their Fox Body Mustang. Rock on!
Recommended Products
Prices pulled from the Amazon Product Advertising API on:
Product prices and availability are accurate as of the date/time indicated and are subject to change. Any price and availability information displayed on [relevant Amazon Site(s), as applicable] at the time of purchase will apply to the purchase of this product.

