
DIY Oil Change

Changing My Oil
Performing a DIY oil change can help your car last longer and prevent costly breakdowns. Over time, engine oil breaks down and gets contaminated. Changing motor oil is a fairly easy DIY project that can save you some serious money. I’ve been changing my own oil since I first started driving. I like the peace of mind knowing it’s done right. Saving money is nice too. See your car’s owner’s manual for recommended oil and change intervals.
Tools & Equipment
You don’t need a tool box full of tools to do a DIY oil change. A one time investment can mean big long term savings. Typically, the tools required to perform an oil change include: wrench for drain plug, oil filter wrench, a funnel and some sort of drain pan. Oil filter configurations vary widely. Be sure to do a little research before buying a filter wrench. Drive on ramps or a jack and jack stands will make the job easier. Most of these tools can be used to perform other maintenance and auto repairs.
Motor Oil
Check your car’s owner’s manual for the recommended oil for your car. Honestly, any name brand oil is fine. Walmart and Amazon both have their own oil brands. Both of these brands are made by some of the same companies that make the name brands. Changing your oil on a regular basis is more important than the brand you use. Over the years, I’ve had good luck with Valvoline, Penzoil and Motorcraft auto engine oils.
When it comes to buying oil change supplies the big name local auto parts stores usually have substantially higher prices than Amazon and Walmart.
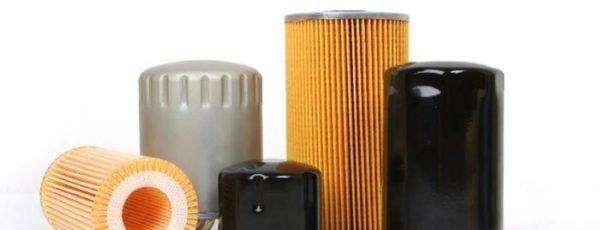
Engine Oil Filters
Purolator, Motorcraft, Wix, and AC Delco are solid oil filter choices. I’ve used Motorcraft, Purolator and AC Delco oil filters with great success. Ford automobiles come from the factory with Motorcraft and AC Delco filters come standard on Ford and GM automobiles. Bosch, STP and store brand oil filters are ones to stay away from.
Much like motor oil, oil filters are usually more expensive at your local auto parts store than at Amazon or Walmart. You can find engine oil filters for your car here.
Engine Oil Filters
Basic DIY Oil Change Process
- It’s best to warm the engine up so the oils drains better. A short 5 minute drive should be all that’s needed. If the engine is hot off the highway, waiting 20 minutes will prevent burning yourself.
- Drive the vehicle up onto the ramps, set the parking brake, and shut off the engine. Remove the oil fill cap and dipstick and set them aside.
- Place the drain pan under the oil filter and remove the oil filter. You might need an oil filter wrench for removal. Check that the gasket comes off with the old filter. Otherwise, you’ll have to scrape the old gasket off the engine. Use a rag to clean the oil filter mount and surrounding areas.
- Apply a thin film of new engine oil to the gasket of the new oil filter, then spin into place. Once the gasket makes contact, tighten the filter an additional 180° to 270° (1/2- to 3/4-turn). Do not use the oil filter wrench to tighten the oil filter.
- Place the drain pan to catch the oil from the crankcase, and remove the oil drain plug. Be sure to remove the plug slowly, so you don’t lose it in the drain pan.
- Once all the old oil has drained, replace the oil drain plug. Do not overtighten.
- Place the funnel in the oil fill hole, and slowly add oil until you reach the capacity listed in your owner’s manual. Replace the oil fill cap and clean any spills immediately with rags.
- Start the engine and look under the vehicle for any leaks. If all is well, roll the vehicle back down the ramp on a level surface. Let the engine run for 2 minutes, and shut it off.
- After the engine has sat for 5 minutes, use the dipstick to check oil level, adding if necessary.
Recommended Supplies
- 15 Qt. (14. 25 L)
- Ideal for Oil Recycling
- Drain Direct - No Oily Tub, Funnel, or Mess
- Heavy-Duty Construction with E-Z Handle Design and E-Z Roll Wheels
- Large 8 (20 cm) Opening with Screw Cap
Prices pulled from the Amazon Product Advertising API on:
Product prices and availability are accurate as of the date/time indicated and are subject to change. Any price and availability information displayed on [relevant Amazon Site(s), as applicable] at the time of purchase will apply to the purchase of this product.
- Chemical-resistant polyethylene construction
- Use for engine oil, gasoline, kerosene, engine fluids, diesel, grease, water, etc.
- Wide Neck and Wide Spout for Rapid Filling. Colors vary.
- 7-1/2 in. funnel with removable 8 in. flexible extension, 40 fl. oz. capacity.
- 2-in-1 deluxe economy funnel: 7-1/2 in. funnel with removable 8 in. flexible extens
Prices pulled from the Amazon Product Advertising API on:
Product prices and availability are accurate as of the date/time indicated and are subject to change. Any price and availability information displayed on [relevant Amazon Site(s), as applicable] at the time of purchase will apply to the purchase of this product.
Final Words
Save the jug your oil comes in and fill it with your used oil. Any local store that sells engine oil will accept your used engine oil for proper disposal or recycling. You can dispose of used oil filters in your regular trash. Be sure to write down the date and your car’s odometer reading on the day you change your car’s oil.

